
I still remember the moment Homemade Italian Bread truly found its way into my cooking routine. It started as a bit of an experiment after a few not-so-great attempts at artisan bread dough. The breakthrough? Realizing that patience and simple ingredients were the stars of this loaf. Once it came out of the oven with that perfect Italian bread crust, I knew I had something special.
This Homemade Italian Bread quickly became my go-to for family dinners and even busy weeknights when I needed something comforting but straightforward. There’s just something about pulling a warm loaf from the oven, the smell filling the whole kitchen, that makes any meal feel like a celebration—even if it’s just an ordinary Tuesday. It’s wholesome, satisfying, and feels like a little gift you give yourself every time you bake it.
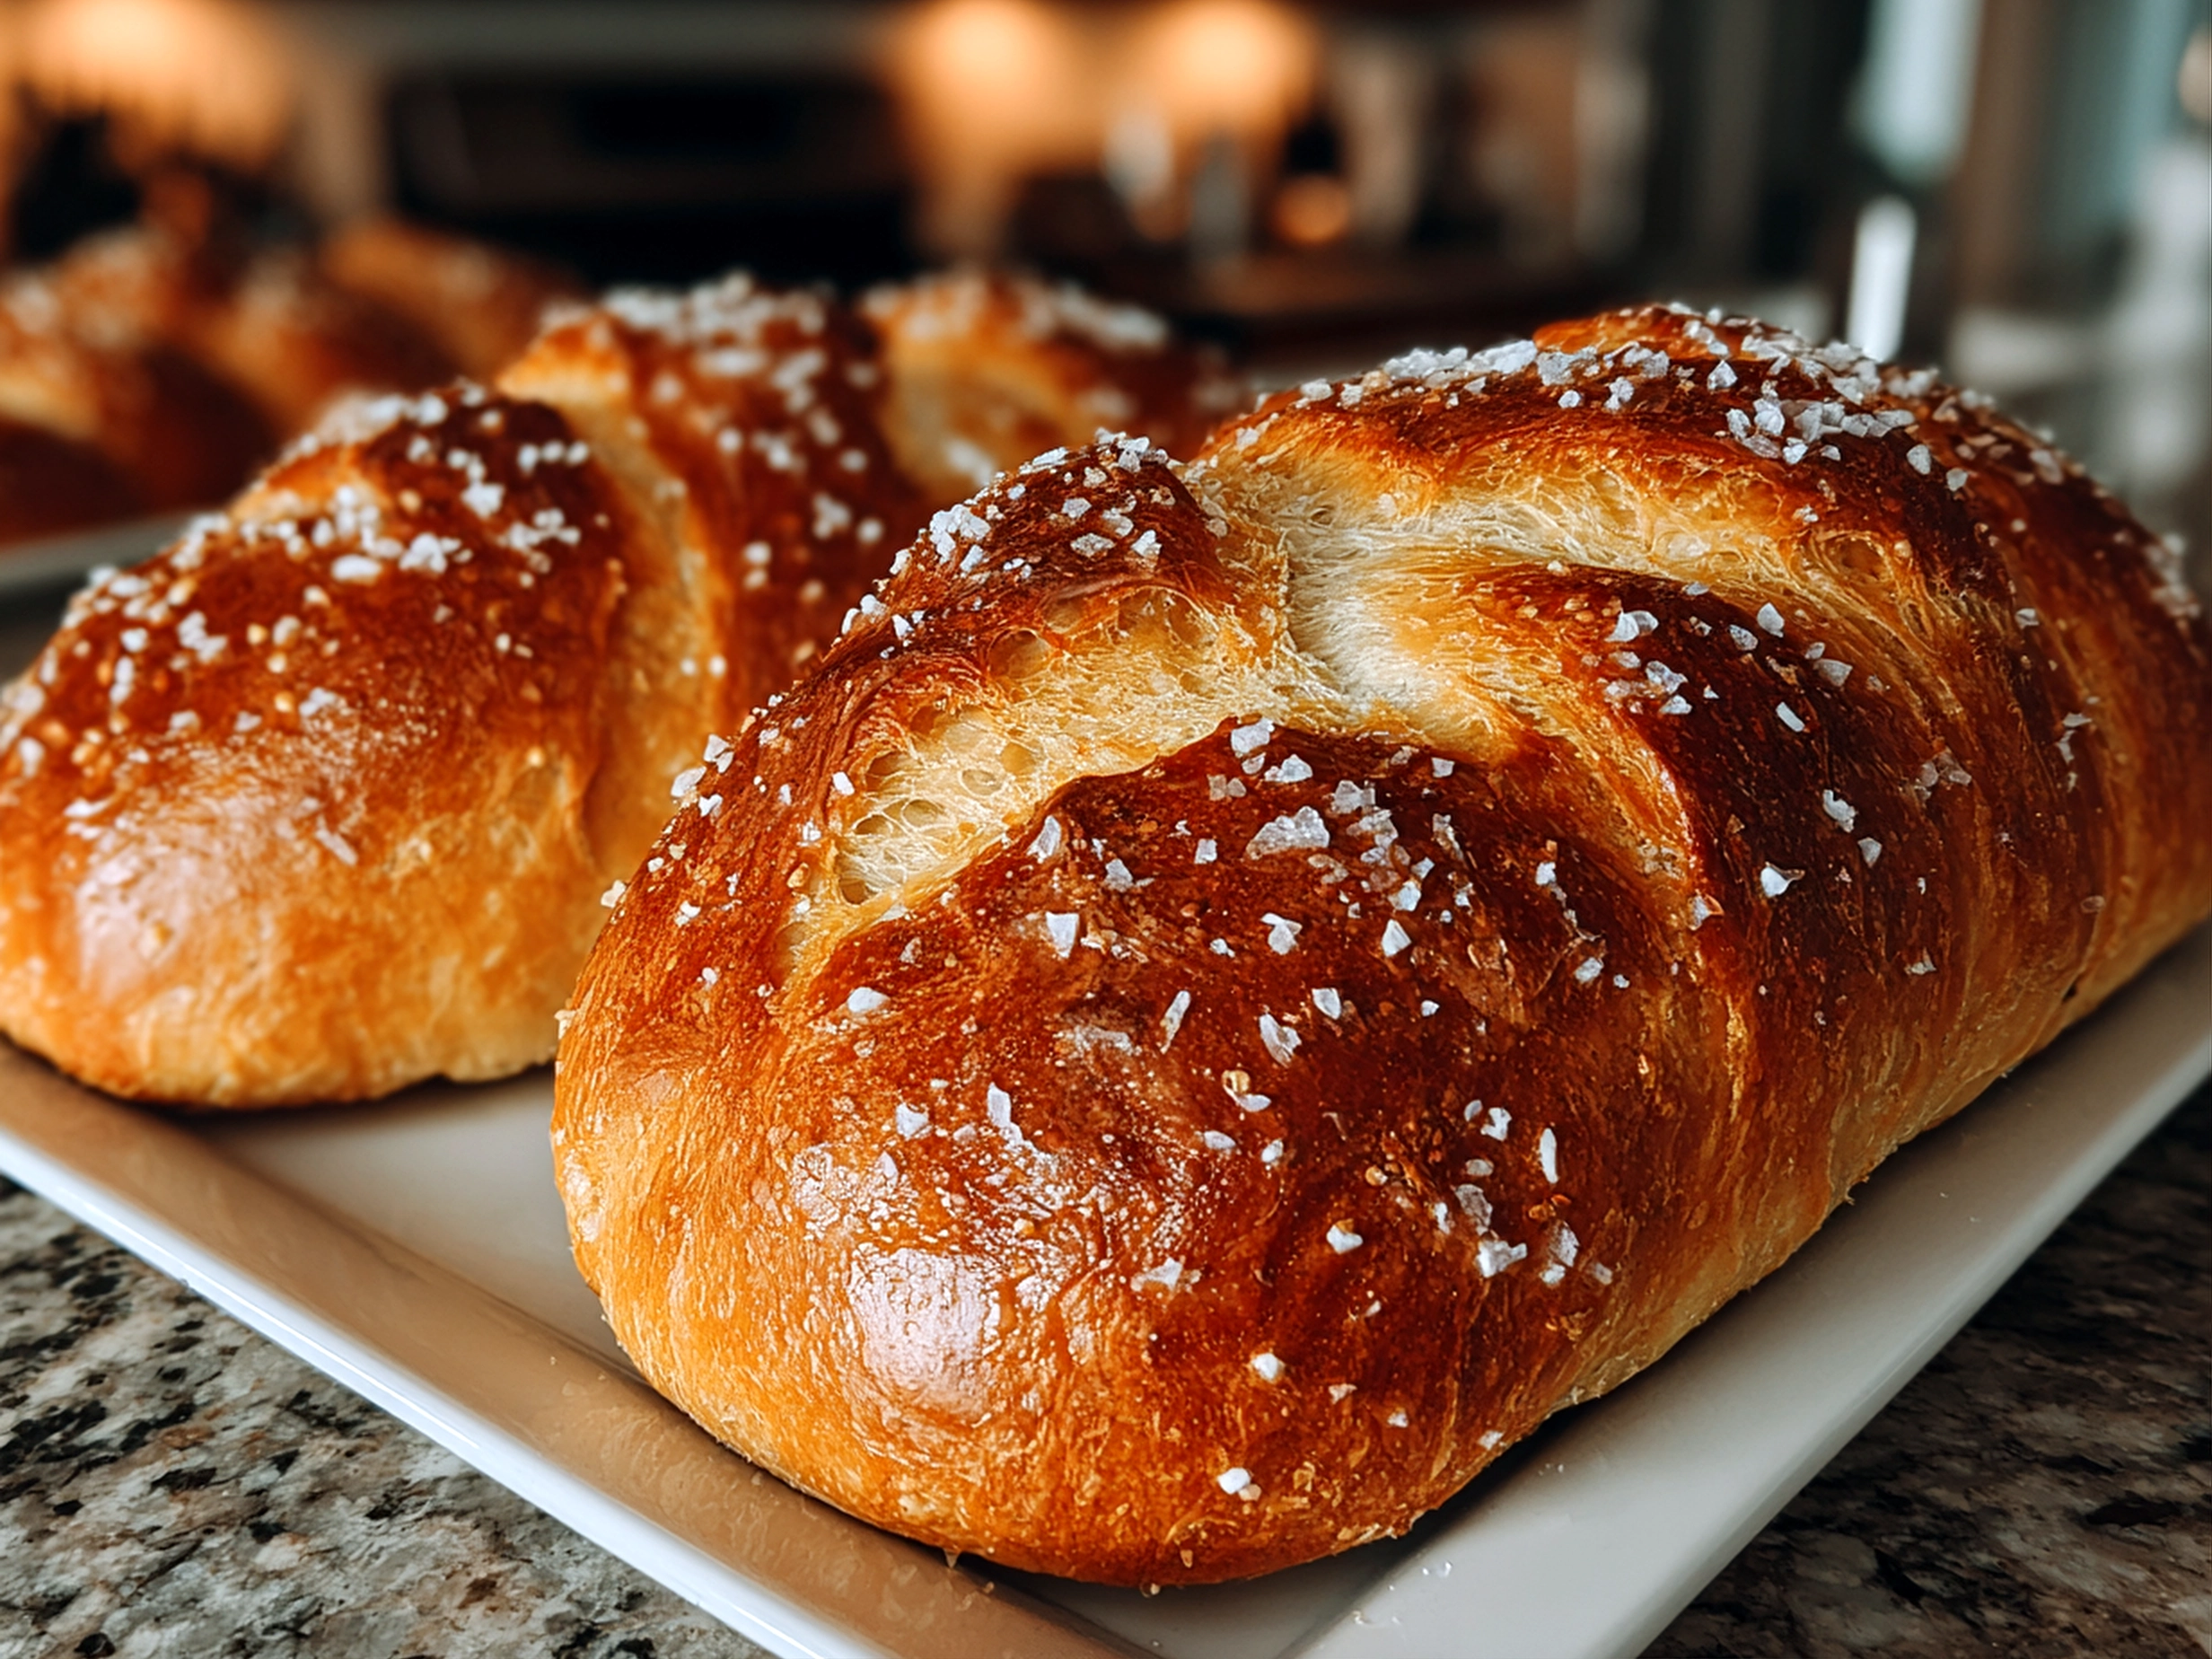
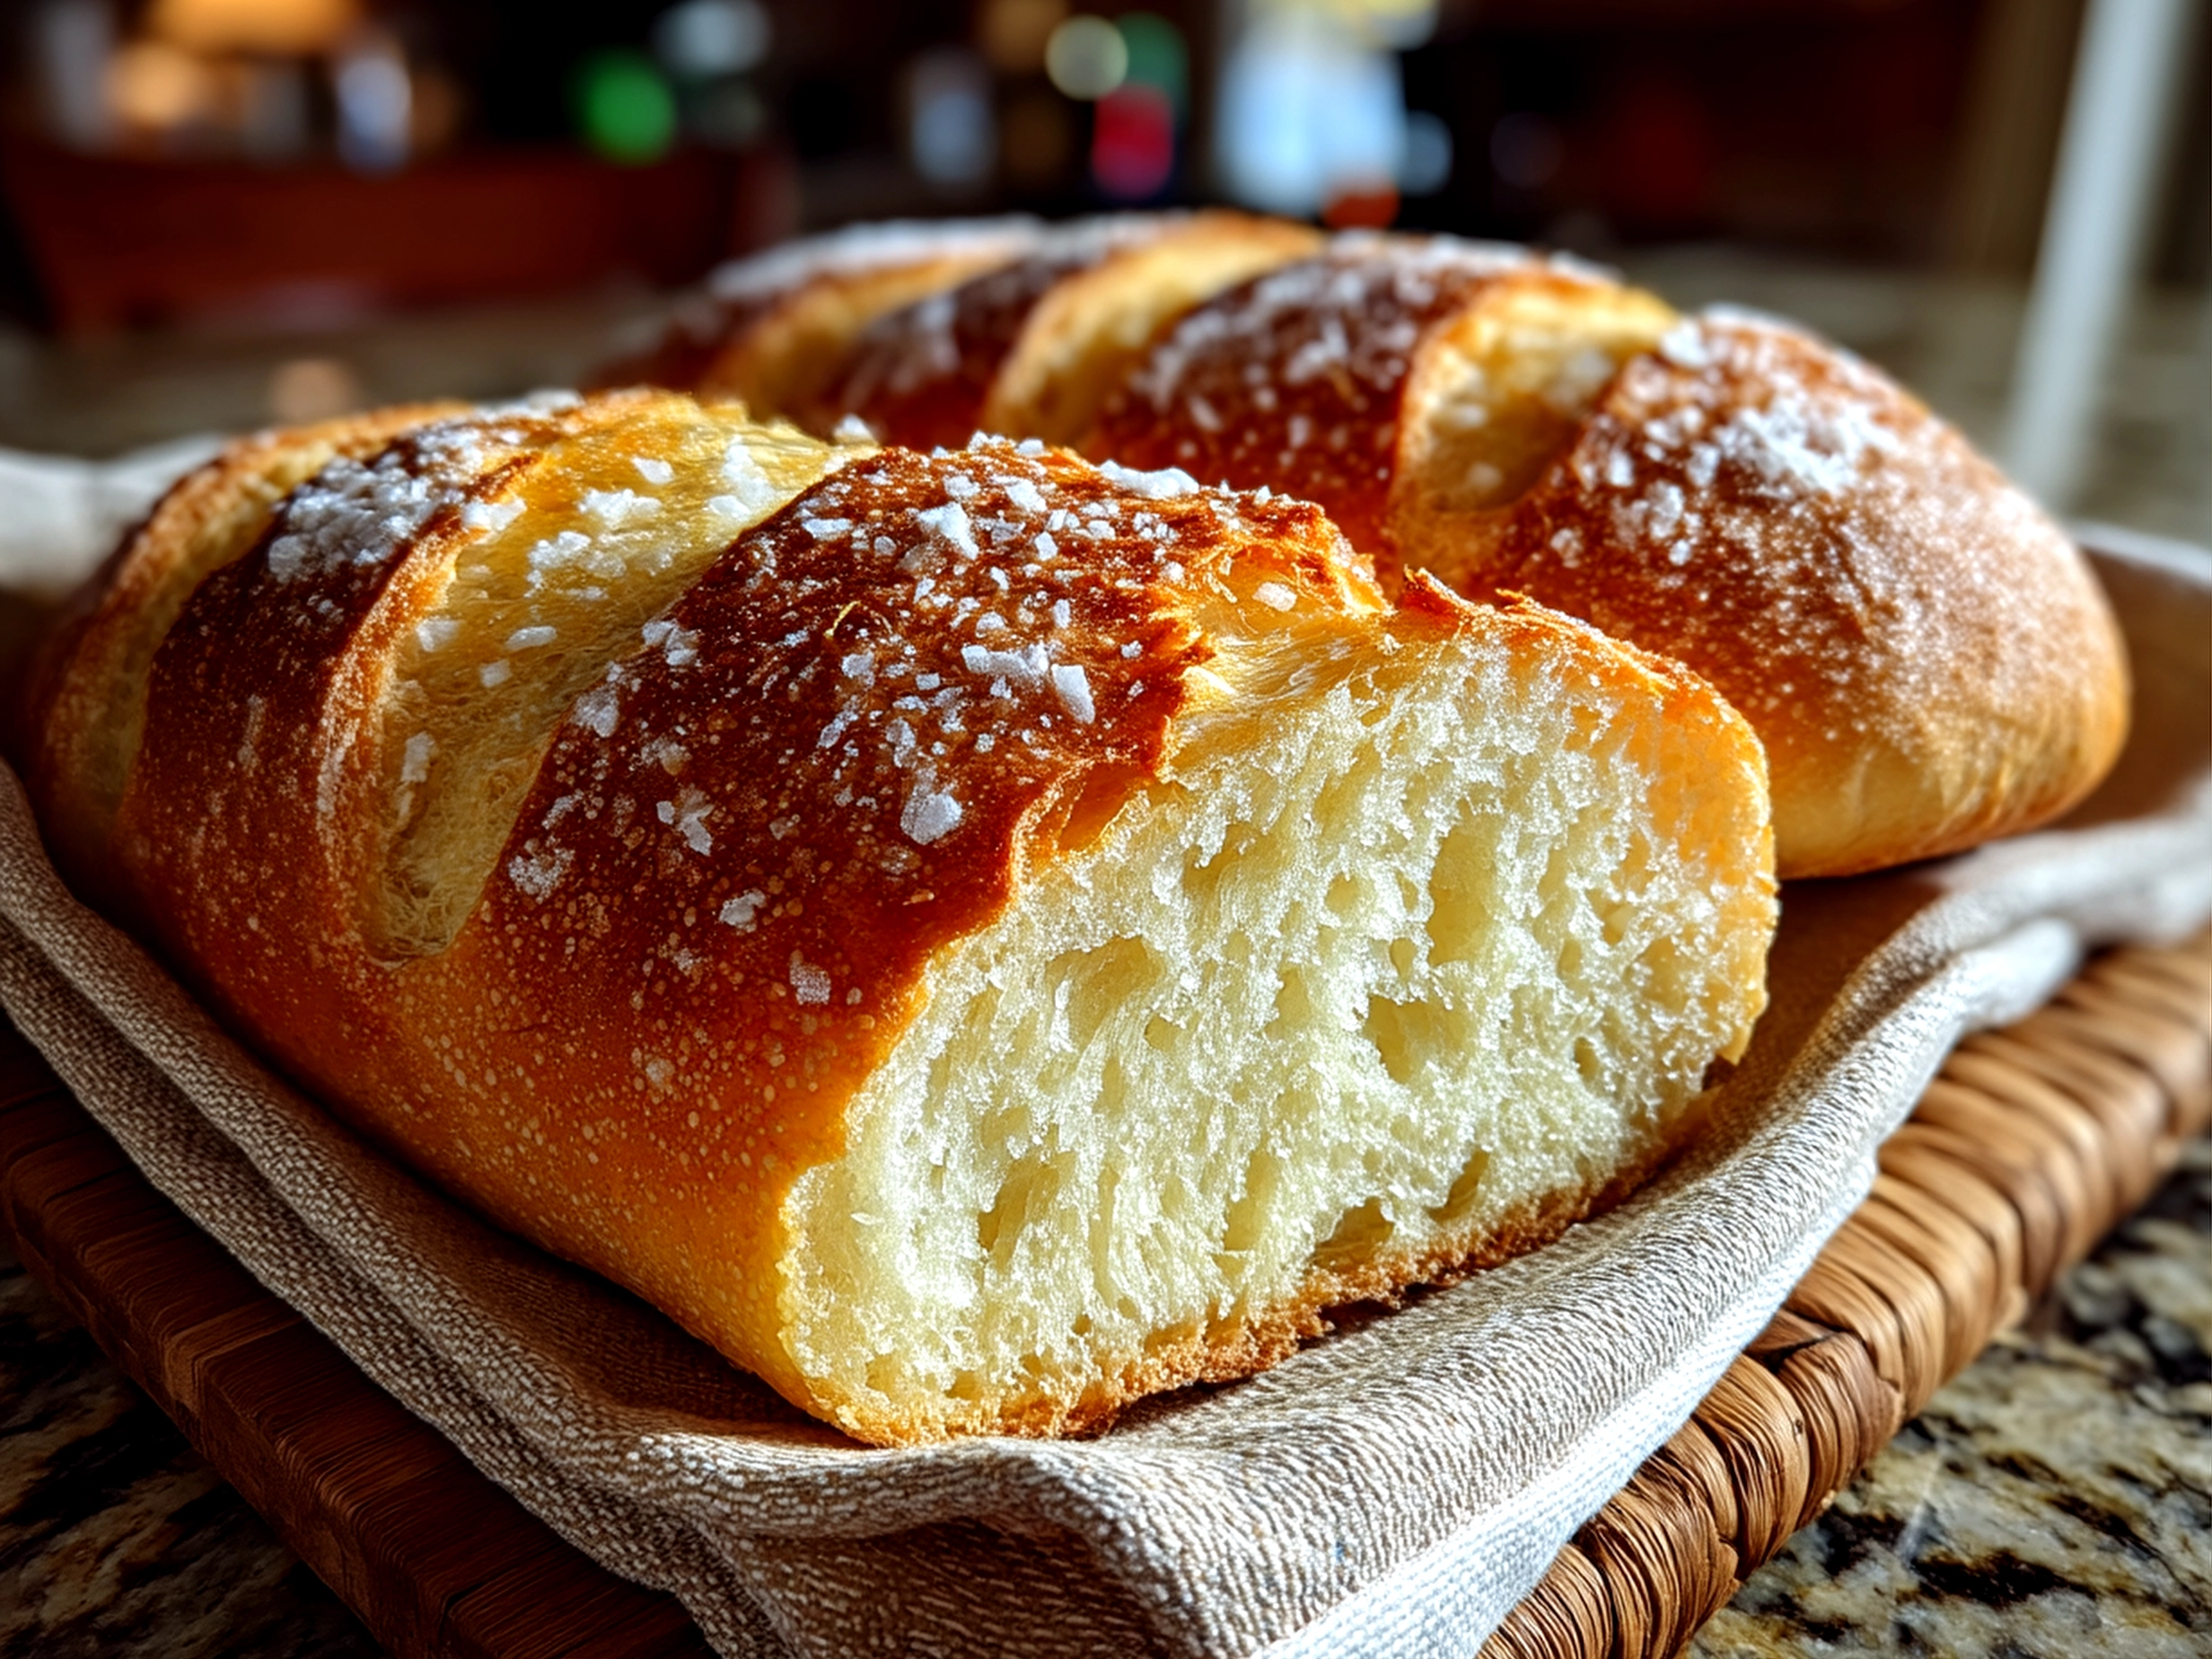
What I love most is how approachable this recipe is. Whether you’re new to bread baking or have been at it for years, this Homemade Italian Bread offers reliable results that don’t require a lot of fuss. The crust has that crisp snap that pairs beautifully with olive oil or dips, while the inside stays tender and perfect for sandwiches or just dipping into your favorite soup.
I’m sharing this recipe with you, friend, because I want you to enjoy the same joy I get from creating such a humble, wonderful loaf. You’ll find baking this Homemade Italian Bread to be manageable, satisfying, and yes, maybe a little addictive. So tie on your apron, and let’s make some bread that feels like home.
What You’ll Need for This Homemade Italian Bread:
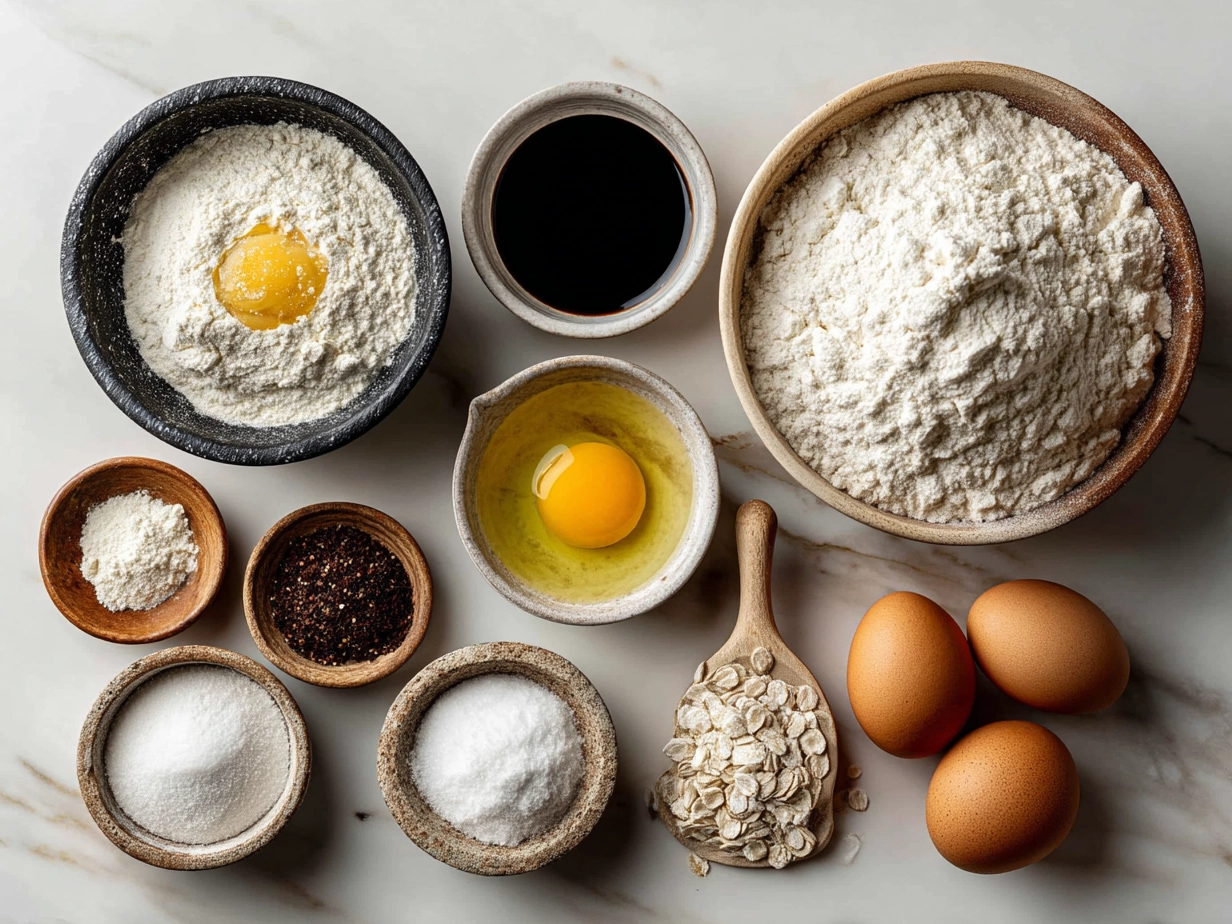
Here’s the simple list of ingredients that keeps this Homemade Italian Bread approachable and delicious:
- 3 ½ cups all-purpose flour (You can swap half for bread flour if you want a chewier texture)
- 1 ½ tsp salt (I always add a pinch more for better flavor)
- 2 tsp active dry yeast (Instant yeast works great here too—just reduce the water a little)
- 1 ½ cups warm water (About 100°F, comfortable to the touch)
- 1 tbsp olive oil (Extra virgin adds nice flavor but regular olive oil works perfectly)
Don’t worry if you don’t have bread flour—using all-purpose flour in this Homemade Italian Bread keeps it budget-friendly and equally tasty. You can find these ingredients at almost any grocery store, making this loaf a reliable staple for your kitchen.
A quick kitchen tip: I like to mix my dry ingredients first, then add the water and oil, which helps the yeast activate evenly. Store your flour in a cool, dry place or even the fridge in humid climates to keep it fresh longer. The yeast should be kept sealed tight in the fridge too, especially if you don’t bake often.
This Homemade Italian Bread keeps ingredients simple because good cooking should be accessible and satisfying. And here’s a little secret—sometimes I sprinkle a few herbs like rosemary on top just before baking to add a fragrant touch.
How to Make This Homemade Italian Bread:
Let’s make this Homemade Italian Bread together, step by step.
- Activate the yeast by mixing the warm water and yeast in a large bowl. Let it sit for about 5 minutes until it’s frothy. This step shows the yeast is alive and ready to work.
- Mix dry ingredients—combine the flour and salt in a separate bowl. Then pour the yeast mixture and olive oil into the flour, stirring with a wooden spoon until just combined. Your dough will look shaggy, and that’s perfect.
- Knead the dough on a lightly floured surface for about 8-10 minutes. This step develops the gluten that gives your Homemade Italian Bread that chewy texture. If the dough feels sticky, sprinkle a bit more flour, but don’t overdo it—you want it slightly tacky for the best rise.
- First rise: Shape the dough into a ball and place it in a lightly oiled bowl. Cover it with a clean cloth and let it rise in a warm spot until it doubles in size—usually about 1 to 1½ hours. This is where patience pays off with your Homemade Italian Bread.
- Shape and second rise: Once risen, punch the dough down gently and shape it into a loaf or oval. Place it on a parchment-lined baking sheet and cover it again for 30-45 minutes.
- Preheat your oven to 450°F with a baking stone or an inverted baking sheet inside to heat up. Placing your loaf on a hot surface helps develop that classic Italian bread crust.
- Score the dough with a sharp knife or razor blade to create those signature cuts on top. This allows the bread to expand without bursting awkwardly.
- Bake the bread for 25-30 minutes. Halfway through, I like to add steam to the oven by placing a small pan with water at the bottom—this helps with the crust. Your kitchen will smell amazing when this Homemade Italian Bread is ready.
- Cool before slicing: Let the bread cool on a wire rack to finish baking inside. If your Homemade Italian Bread looks slightly pale or unevenly crusted, don’t worry—it will taste fantastic all the same.
From start to finish, this Homemade Italian Bread takes about 3 hours, including rising time. While that cooks, you can prep your dinner sides or tidy up the kitchen—multitasking helps keep the process smooth.
Through making this recipe many times, I’ve learned that the quality of your yeast and water temperature really makes a difference. Also, don’t skip the steam—it’s essential for a crust that’s crisp and beautiful.
Serving Your Homemade Italian Bread:
This Homemade Italian Bread truly shines when served warm with just a drizzle of olive oil and a sprinkle of sea salt. It’s perfect alongside soups like minestrone or hearty tomato basil—we even enjoy it dipped into olive oil mixed with balsamic vinegar for a simple, flavorful snack.
Another family favorite is slicing this bread for sandwiches—its sturdy, yet tender crumb holds up well with everything from classic Italian cold cuts to roasted veggies. It’s also great for making garlic bread: just spread some butter, garlic, and parsley on slices, then toast them in the oven.
This loaf is ideal for casual weeknight meals but also shines during gatherings. The crusty outside and tender inside invite everyone to tear off pieces and share. For seasonal variations, I’ve tried adding sun-dried tomatoes or olives into the dough for a little extra flavor twist.
Leftover Homemade Italian Bread? No problem. Turn it into croutons for salads or soups, or use it for morning toast with jam or honey. My kids love dunking it into scrambled eggs or making quick grilled cheese sandwiches with it.
Friends and family always ask me for this recipe after meals, and it’s a make-again recipe in our house for sure. If you enjoy this, you might love trying this easy no-knead ciabatta bread recipe or my favorite Slow Cooker Italian Beef Sandwiches that pair beautifully with Italian bread.
Common Questions About This Homemade Italian Bread:
I always get these questions when friends try this recipe, so here are some answers from my kitchen to yours.
Can I make parts of this Homemade Italian Bread ahead of time?
Yes! You can prepare the dough and let it rise in the fridge overnight. Just take it out about an hour before baking to come to room temperature. This slow fermentation actually improves flavor.
What’s a good substitute for active dry yeast in this Homemade Italian Bread?
Instant yeast works great—just mix it directly with flour. If you’re using sourdough starter, that’s another great way to make artisan bread dough, but timing will differ.
How can I adjust this Homemade Italian Bread for more or fewer people?
This recipe doubles or halves easily. Just keep the ingredient ratios the same. For best results, don’t reduce the yeast too much; it helps achieve a good rise.
Why is my Italian bread crust not as crispy as I hoped?
Try adding steam in your oven by placing a small pan with hot water on the bottom rack during the first 10 minutes of baking. Also, bake on a preheated stone or steel if possible.
Can I make a Homemade Ciabatta instead?
Yes! Ciabatta uses a wetter dough and often no kneading. For a good start on homemade ciabatta, check out Sally’s Baking ciabatta bread recipe or this Italian homemade ciabatta bread recipe.
What if my dough feels too sticky or dry?
Sticky dough usually means you can sprinkle in a bit more flour during kneading. If it’s crumbly or dry, add a teaspoon of water at a time. Humidity and flour absorbency vary.
How long will this Homemade Italian Bread keep?
This bread is best eaten fresh but will store well in a paper bag for 2 days. Freeze extra slices wrapped tightly for up to a month.
Any tips on shaping artisan bread dough?
Keep your hands floured but don’t add too much flour on the dough. Gentle shaping preserves air bubbles for better texture.
If you’re curious about pairing this bread, I recommend checking out my Cheddar Jalapeno Cornbread Muffins for a fun side or this cinnamon swirl banana bread for a sweet treat afterward.
Final Thoughts on This Homemade Italian Bread:
This Homemade Italian Bread holds a warm spot in my recipe collection because it never fails to bring comfort and connection to our table. It’s forgiving, dependable, and versatile—a real family favorite that feels like a little celebration, no matter the occasion.
My Top Tips for This Homemade Italian Bread:
- Use warm water (not hot) to activate your yeast properly.
- Don’t skip the steam during baking; it makes all the difference for the crust.
- Be patient with both rises; the wait rewards you with better texture and flavor.
As for variations, I often add fresh rosemary for an herby twist, toss in some olives for savory bites, or try it with a sprinkle of parmesan on top. The version requested most often by my family is the classic simple loaf—it’s the perfect canvas for everything we eat.
I hope you make this Homemade Italian Bread your own, adapting it to your taste and kitchen rhythm. Baking bread can feel a little intimidating at first, but with a recipe this straightforward, you’ll be surprised at how satisfying and doable it really is. Ready to give it a try? I can’t wait to hear what you think and how you enjoy your warm, crusty loaf fresh from the oven.
Happy baking, friend!
Homemade Italian Bread

This classic Homemade Italian Bread features a crisp crust and soft, airy interior, perfect for sandwiches or dipping in olive oil and balsamic vinegar.
- Prep Time: 15 minutes
- Cook Time: 35 minutes
- Total Time: 1 hour 50 minutes
- Yield: 8 servings
- Category: Dinner
- Method: Baked
- Cuisine: Italian
Ingredients
- 4 cups all-purpose flour
- 1 1/2 cups warm water (110°F)
- 2 teaspoons active dry yeast
- 2 teaspoons sugar
- 2 teaspoons salt
- 1 tablespoon olive oil
Instructions
- In a small bowl, dissolve sugar and yeast in warm water. Let it sit for 5–10 minutes until frothy.
- In a large mixing bowl, combine flour and salt.
- Add the yeast mixture and olive oil to the flour. Stir until a dough forms.
- Turn the dough onto a floured surface and knead for about 8–10 minutes until smooth and elastic.
- Place dough in a greased bowl, cover with a clean kitchen towel, and let it rise in a warm place for about 1 hour or until doubled in size.
- Punch down the dough and shape it into a loaf. Place on a greased baking sheet or loaf pan.
- Cover and let it rise again for 30–45 minutes.
- Preheat oven to 375°F (190°C). Make a few shallow slashes on top of the loaf with a sharp knife.
- Bake for 30–35 minutes until the bread is golden brown and sounds hollow when tapped.
- Remove from oven and cool on a wire rack before slicing.
Notes
For extra flavor, brush the top with olive oil and sprinkle with sea salt or herbs before baking.